A Content delivery/distribution network has several servers in addition to the main server. This helps in handling user requests all over the globe in a timely fashion and also significantly reduces the overall load time of the pages.
This provides a better user experience which in turn has a better impact on the SEO of your website.
There are various CDN services, but Cloudflare is the most popular, well-known, and best CDN and it is also free to use. In this article, let’s see how to set up Cloudflare CDN for a WordPress website, step-by-step with illustrations.
Table of Contents
How CDNs work
CDNs are mostly used when a site receives a high amount of traffic. When the traffic exceeds a certain limit, it becomes hard for a single server to manage all the incoming request loads.
Therefore several servers all over the world are deployed and these servers will take care of the requests to that particular website that comes from the nearby geographical region.
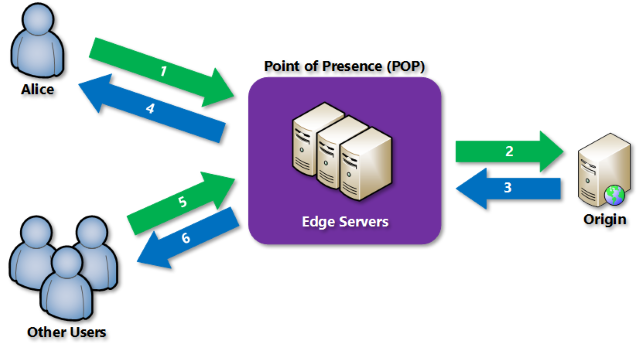
This not only reduces the load of the main server but also increases the site speed drastically.
In case of any disaster or the main server going down, these CDNs still stand tall as a backup serving the audience without spoiling the user experience or letting the website go down completely.
The origin server is the main or the primary server that contains all the data and where the website is originally hosted on. And an Edge Server is a server that carries the data and is spread over the world.
Benefits of using CDN
There are multiple benefits to using a CDN for your website. Here we have listed down a few main points.
Masks the origin server – A CDN protects the Origin server’s identity and masks its IP and other information. This makes the origin server secure and free of any major attacks.
Keeps your Site Secure – Protects DoS and DDoS attacks by splitting the traffic between multiple servers. DDoS attacks can make a website unavailable by bombarding the site with a huge amount of fake traffic. By Using CDN this kind of attack can easily be prevented.
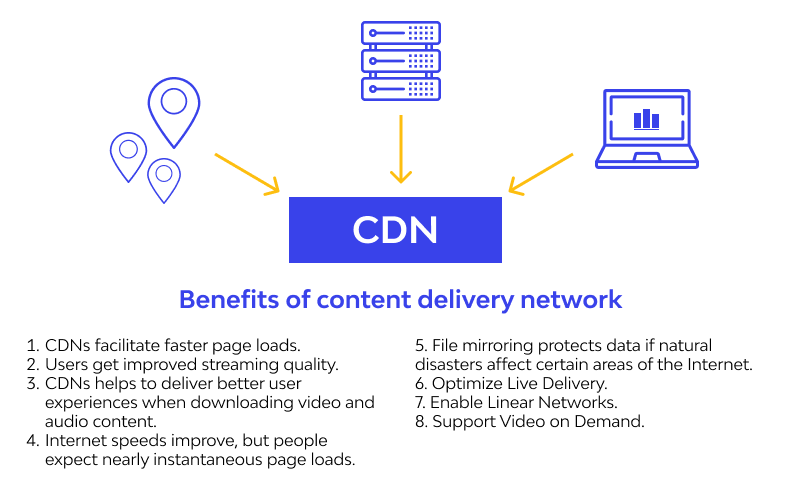
Reduces the Load time – By employing multiple edge servers, serving user requests becomes faster. Reducing the overall Load time.
Backup & Recovery – In case of any disaster to the server and its data, there will always be a backup. CDN re-routes the traffic to the available servers, thus preventing your site from going down.
Handle Website Traffic – Can handle huge and sudden bursts of traffic without the site going unavailable.
How to Integrate Cloudflare CDN with WordPress site
Step 1: Find the name servers of the website for which you are going to set up Cloudflare CDN.
To Find the Nameservers there are several ways, Let me cover the two most popular methods.
- Method 1: Visit “who.is“ site and enter the name of your website. Scroll down to the registrar info section and search for nameservers info
- Method 2: Log in to your domain registrar, and then find the details about your domain. The exact step and the name server interface will be different for this method and it differs based on the type of domain registrar you have. To find detailed steps, search for youtube videos or read your domain registrar’s documentation.
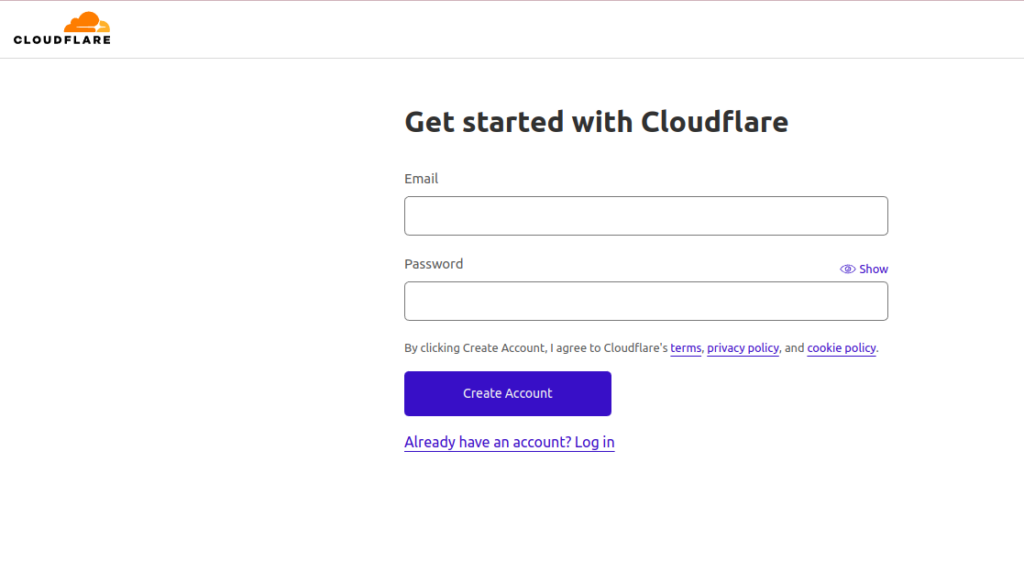
Step 2: Visit cloudflare.com and signup if you don’t have an account. If you already have an account just log in.
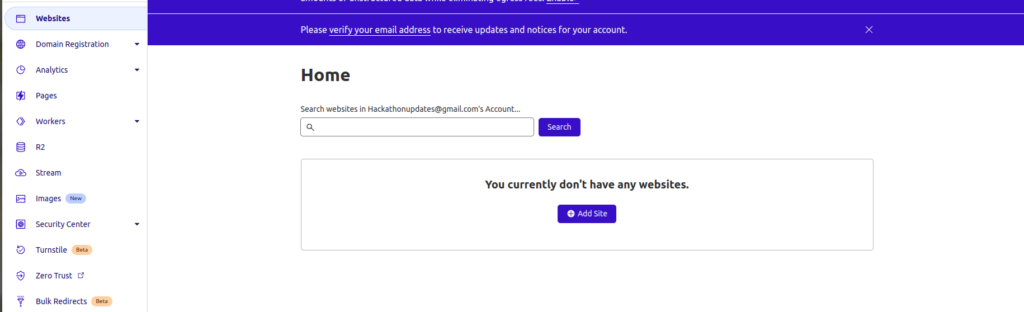
Step 3: After logging in, Click on Add a Site button on the home page.
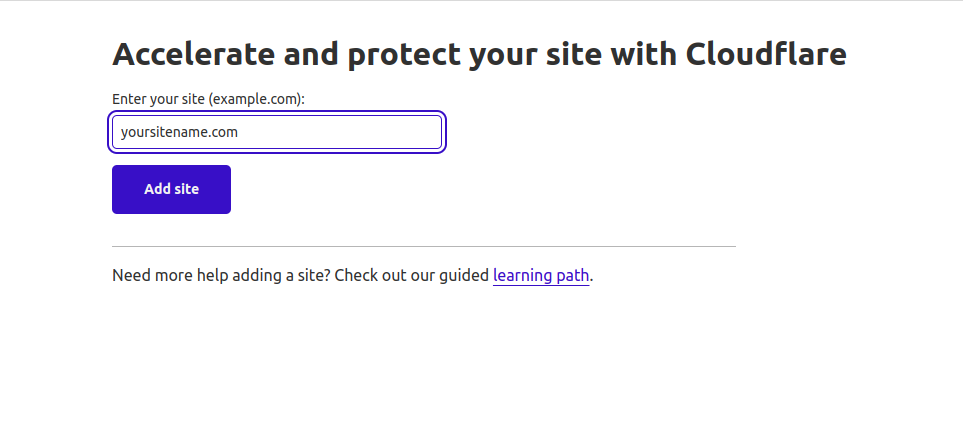
Step 4: Enter the name of your site and click Add Site button
Step 5: Cloudflare will suggest some of the paid plans, scroll down to the Free Plan Click on it, and Press Continue.

Step 6: Now Cloudflare will conduct a quick scan to find all the DNS records associated with your website and will automatically import them to your Cloudflare account. Scroll down and click on Continue.
Now copy the Cloudflare’s nameservers, Press the Click to copy link to copy each of the nameservers
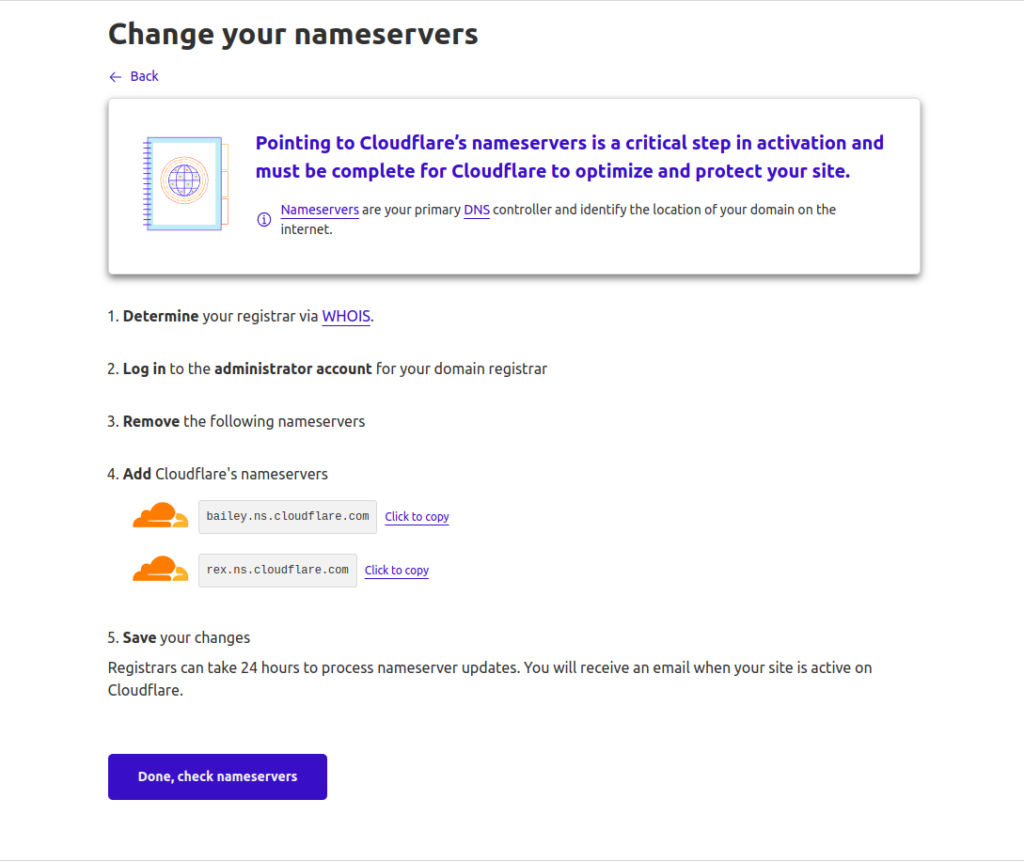
Step 7: Log in to your domain registrar account and navigate to your nameserver
Step 8: Replace the existing nameservers with the Cloudflare nameservers you copied. Save the changes.
After this process, click on Done, Check nameservers
Step 9: You will be taken to the Quick Start Guide.
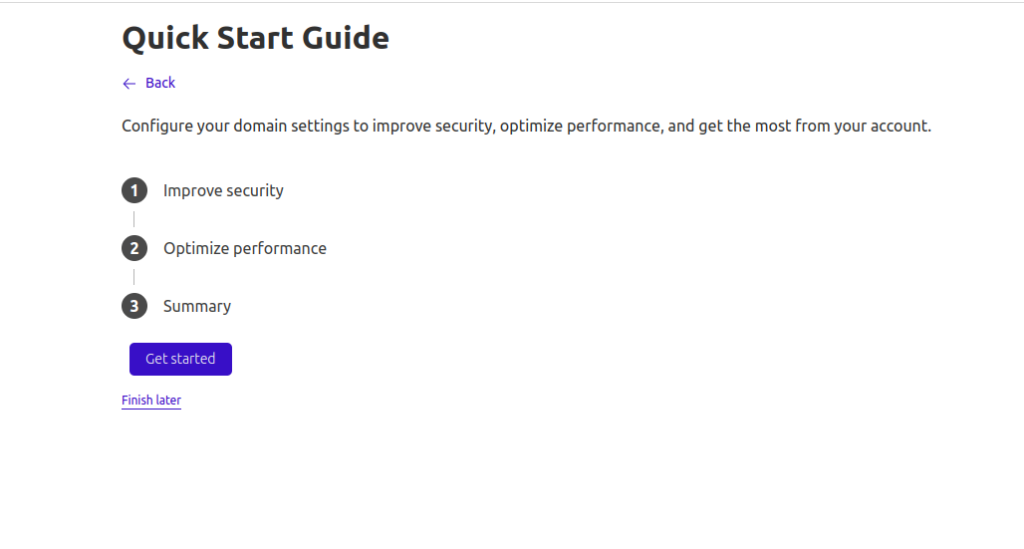
Step 10: Follow the process in the Guide step by step.
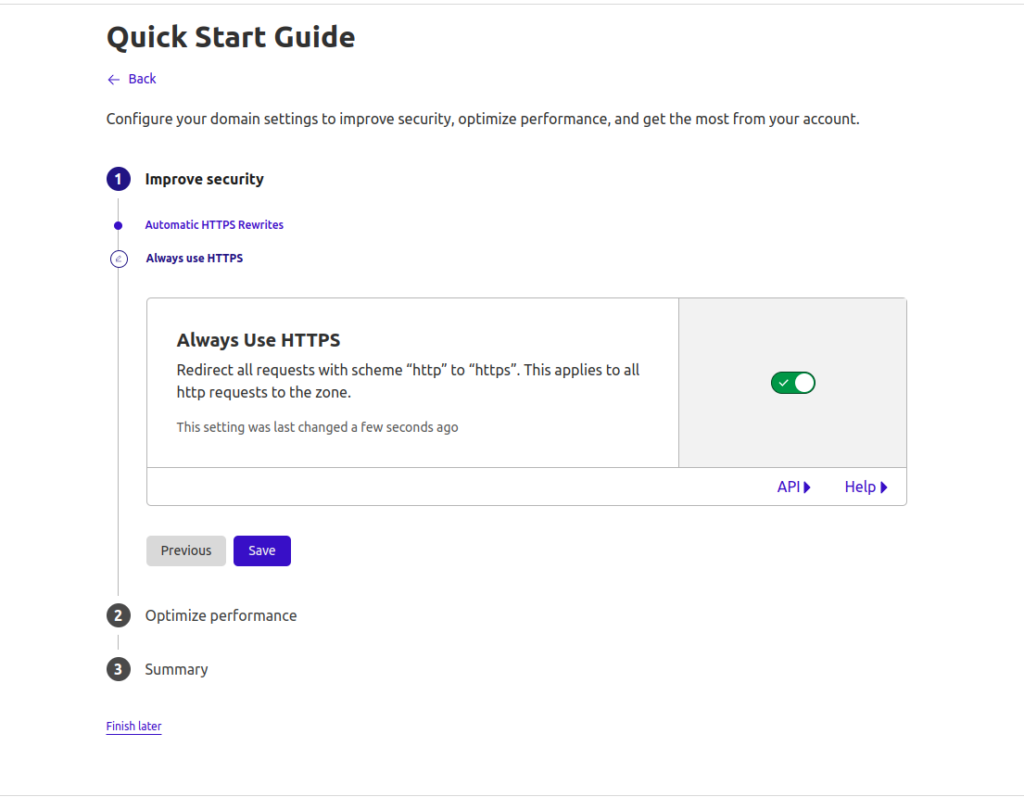

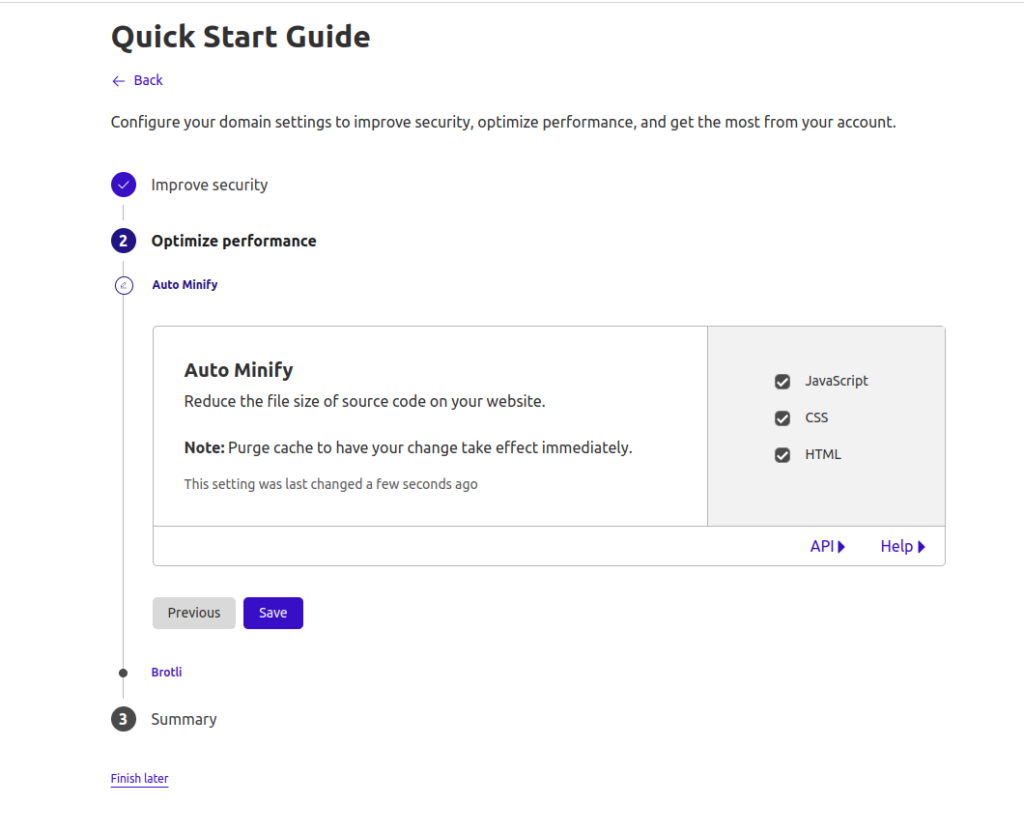
Enable all the switch boxes to keep your site safe and optimize its performance.
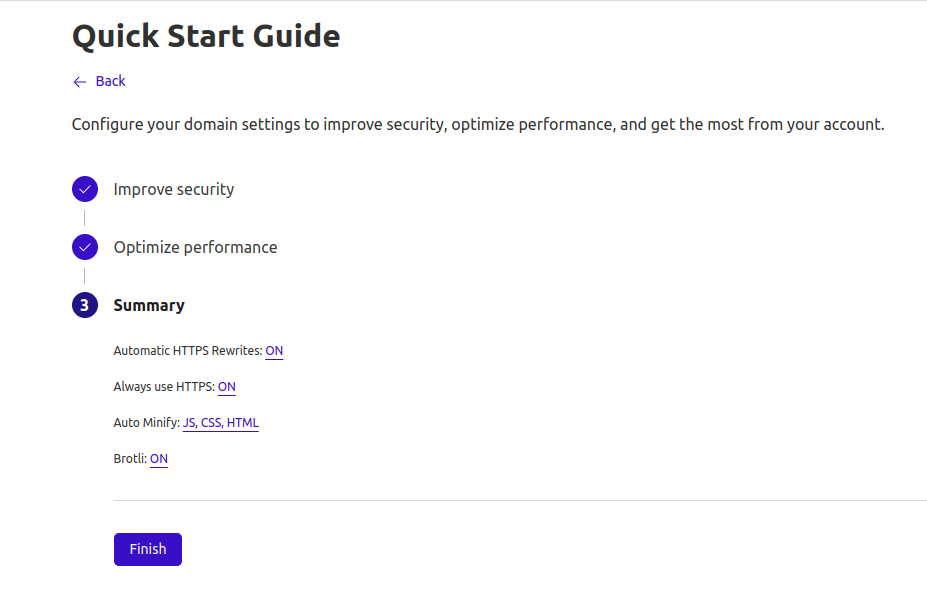
Once all the 3 steps are done, click on Finish.
After about 24 hours, try refreshing the “who.is” records to verify if the nameserver records are updated to Cloudflare’s nameservers
You have successfully set up Cloudflare CDN on your WordPress Website!