Images are everywhere. From social media to advertisements, images circulate everywhere, resulting in an endless stream of visual content.
And with the amount of image content on the web growing at a rapid pace, it’s no surprise that image compression is becoming a key focus for designers and developers alike.
To reduce your site’s file size while still maintaining visual quality and readability, you need to compress your images.
This will not only reduce how much storage space they take up but also make web pages load faster. In this article, we explain how you can compress and optimize images without losing quality.
Table of Contents
What is Image Compression?
Image compression is the process of reducing the size of an image by removing unnecessary detail or replacing it with a smaller but similar image.
One of the most common uses for image compression is reducing the size of an image so that it can be sent over the internet without consuming too much data and storage.
While compression can reduce the file size of your images, it doesn’t reduce their visual quality. When you compress an image, you’re “shrinking” it. This process doesn’t change the dimensions of the image, but it can make the image file smaller.
If you’re using Photoshop or another image editing program, you can change the dimensions of the image to suit your needs. The resulting image is the same dimensions as the original but has a smaller file size.
Different Types of Image Compression
There are two main types of image compression techniques that are commonly used by all compression tools and software. They are lossy and lossless.
Lossless Image Compression
- This technique doesn’t remove any critical or necessary data.
- There won’t be much difference in the file size since the pixels and other critical information are preserved as such.
- This method also preserves picture quality.
- This is a reversible compression technique, an image that is compressed using this method can be easily reversed back to its original form
- This technique is mostly used for text-heavy images that need to be pixel perfect and need crisp appearances like artworks, photographs, infographics, statistical reports, etc..,
Lossy Image Compression
- The lossy image compression technique removes a few pixels and as much data as possible to bring down the file sizes.
- This removal of pixels and data can affect the quality of the image but it won’t be that noticeable or significant.
- The compression level or percent also plays a significant role in determining image quality. The greater the level of compression, the lesser the quality of the image.
- By eliminating large amounts of data, this technique offers a greater reduction in the overall file size compared to the lossless compression method.
- The image file once compressed cannot be retrieved back to its original form. In other terms, the process is irreversible.
- It is a trade-off between the file size and the performance. This technique is best suitable for images that are used for decorative purposes and don’t convey much information or value to the viewers.
How to Compress and Optimize Images
There are many image compression and optimization programs available. In fact, many of them are completely free. But which one is best for you? The first thing to keep in mind is that there is no one best method or tool to compress images.
Different programs have different strengths and weaknesses, and you should use the method that works best for you. To help you find the best image compression program for your needs, there are two main steps that are involved. They are:
i. Finding the right image format
There are many image formats and every format suits a particular type of image. First, select the file format for your image. Some of the popular image formats are:
- JPG – Works best for all images. JPG images are comparatively smaller in size.
- PNG – Supports transparency. PNG occupies the largest amount of space. So, only use them if you need a transparent background. Else moving to JPG is the wisest option.
- SVG – SVG images are made of vectors. They are made of just points and lines. It is infinitely scalable without causing any increase in file size or loss of quality.
- WebP – This file format is developed by google in recent years and it provides high image compression. But this format is not supported by all search engines.
ii. Finding the right resolution
Whenever using images, it is important to know the right resolution of that image. Because with an increase in the resolution of the image, the file size also increases.
So, have a clear-cut idea about the resolution that you need. There is no one size fits all resolution. The resolution depends on the use case of the image and the type of the image as well.
With people using different types of devices with varied screen sizes, it is important to use the right resolution for a better user experience.
Now depending on these two factors, you can use various image resizing, compression, and conversion tools.
What is the Best tool for image compression?
There is no one size fits all rule when selecting a tool for image compression. It depends on the features you require. If you are looking for the best free tool for image compression, then nothing really can beat adobe photoshop.
But not everyone has got a paid plan in photoshop or the skills required to compress and optimize images using photoshop.
That is why there are multiple free and high-quality paid image optimization tools that you can make use of. These tools are easy to use and offer multiple features that can make image compression easy.
One tool that I personally use for image compression is shortpixels. Other highly recommended ones are tinypng and iloveimg.
Shortpixel offers a bulk optimization feature to optimize multiple images all at once. And three main types of compression methods, namely lossless, lossy, and glossy.
If you are using WordPress, then you can make use of Shortpixel’s plugin to optimize your images.

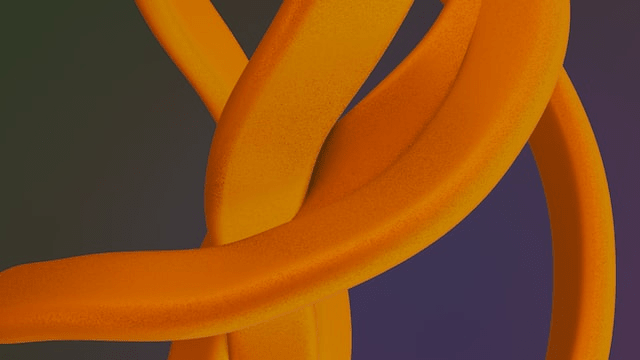
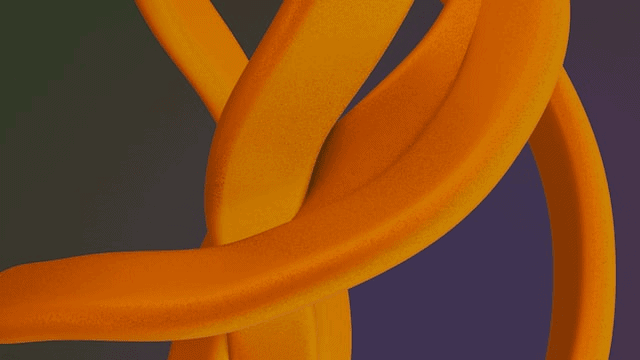
Here is the same image compressed using three different compression formats.
The percentage of reduction in file size in each of these formats is: In Lossy format, the image was made 28% smaller, and lossless compression made the image 2% smaller and 24% smaller file size with the glossy format.
This shows that the lossy compression method offers the largest amount of reduction in file size.
How can uncompressed images affect your website?
If you think, what possible damage can any uncompressed image cause to your website? Well, think again. An uncompressed image not just occupies much storage but also makes your website speed low and also affects the SEO of your website.
If you think that an image occupying a few extra bytes, doesn’t cause any harm. That’s not the case. If you have 10 images on your website, and each of those images occupies 100Kb of extra memory, you need 1Mb of additional storage.
If you have opted for shared hosting this can not only affect the speed of your website but can also cost you extra money for additional storage.
And if you have opted for cloud hosting then the cost of it is going to be very high. That is why people make so much effort in optimizing images.
Which Images Should Be Compressed?
To determine if you should compress your image, you need to consider how valuable it is to your visitors. The purpose of the image is the most important factor to consider when deciding if your image is worth compressing.
Decorative images that don’t convey any meaning and are used just for visual attraction can be compressed by a huge size. Because these images need not have pixel-perfect precision, sacrificing some image quality, in this case, is acceptable.
But if the images play an important role in the content. Eg: A portfolio of images of a photographer, infographics, Diagrams, Graphs, or any images that convey a lot of meaning, shouldn’t be compressed beyond a certain limit.
Because compressing them too much can lead to a loss of quality.
What is the Best Image Format for the Web?
There are many different image compression formats that you can choose from when you’re creating your images. The most common formats are GIF, JPG, and PNG. Each one has its advantages and disadvantages, and you should use the one that’s best for you.
GIF is the oldest image format, but it’s also the least capable of compression. It is mostly used for small moving animated images.
PNG – PNG is an image format with high resolution that is well-suited for images with a lot of detail. With PNGs, you can make the background transparent.
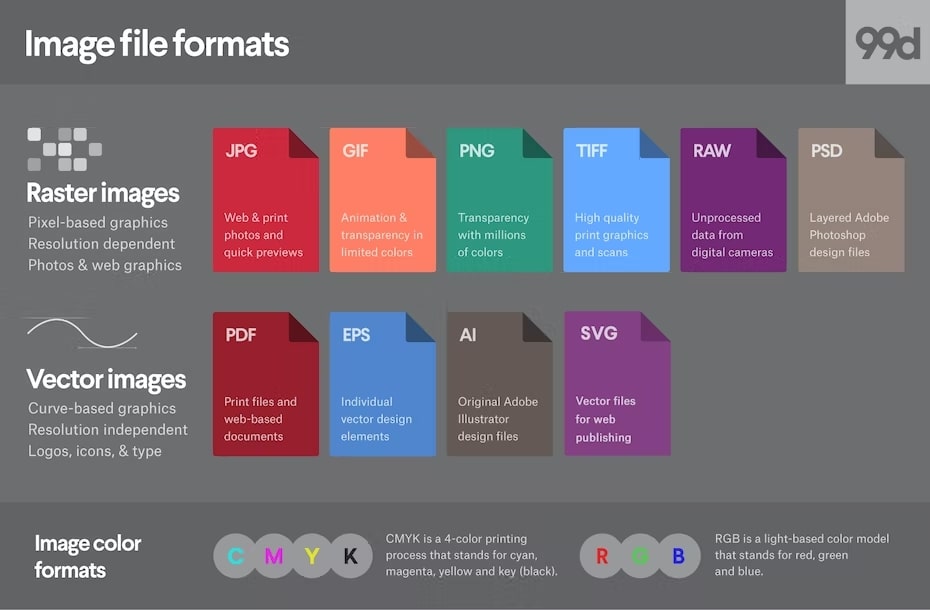
JPG – JPEG images tend to have a lower level of compression than PNG images. This means that if you want to achieve the same level of image quality in a JPG image with as much detail as possible, you may need to make additional edits to the image.
WebP – The WebP image format is a lossless image compression format. In WebP format, the file size is extremely small. The quality is also very high, with no loss in color fidelity.
AVIF – This Format offers a good amount of file size reduction for lossy compression. This format is very efficient and produces quality images even after compression. Also, it is supported by most of the popular browsers.
So, Which format is the best for the web?
Here is a list of image sizes of the same image in different file formats.
- JPG 24.3kB
- PNG 75.9kB
- Avif 3.9kB
- WebP 12.8kB
As you can see the same image in AVIF format occupies the least space and in PNG format occupies the most space in this case. But it may vary depending on the type of image you use. But it is always best to go with WebP (if it is supported by most of the popular browsers), AVIF, or JPG.
Tips for Keeping Image File Size Under Control
Whether you’re using an image compression tool or manually compressing and optimizing your images, there are a few things you can do to keep file size as low as possible.
- Don’t rush before the compression is fully done. This helps you avoid accidental or malicious compression.
- Use Image Optimization Tools Correctly. Learn how to properly use the tool to make the most out of it.
- Use the correct settings for the type of image you’re compressing.
- Use a 64-bit operating system and processor to get the best results from your image optimization program.
- If you’re using a free program, it’s worth paying for an image optimization tool that’s dedicated to image compression.
Conclusion
Image compression and optimization might feel like an unwanted task, but it has got so much impact on your website’s overall performance and speed. Invest in the right image optimization tool and save your time, storage, and money. Hope this article helped you, drop your thoughts and comments!

